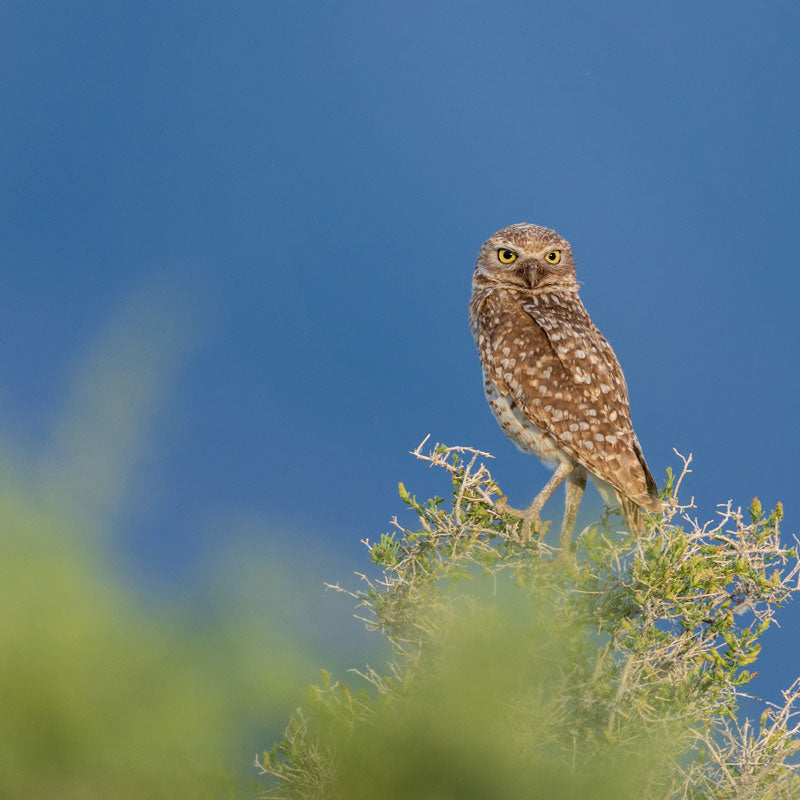
For wildlife photographers, there’s nothing like the feeling of capturing that magical moment in nature where the light, focus, and story all come together in one seamless image. It’s that moment that keeps bird and wildlife photographers motivated to get the next best shot. Bird photography is so unique due to the fact that there are numerous components involved to help create these captivating shots. So, what are these components? Let’s take a look!
The Right Camera Gear
Having the right tools, in this case, the right camera and lens, can be a huge asset. There are a few features bird photographers look for in a camera. The first one is the sensor size. There are a few pros and cons to both a crop-sensor and full-frame camera. When using a crop sensor, the major pro is that you gain more reach. For example, when using a 300mm full-frame lens, due to the 1.5x crop factor it acts more like a 450mm focal length. On the other hand, crop sensors typically have more noise/grain. To put it simply, crop sensors equal better reach while full-frame equals better quality.

In addition to the sensor size, a camera that is capable of fast shutter speeds, a high frame rate, and a fast autofocus system is crucial. Capturing birds in flight or on the move is no easy task. In most cases, using a shutter speed above 1/1000 of a second is necessary to eliminate any motion blur. Typically, wildlife shooters will set their cameras to high frame rate shooting. That’s where shutter speed and frame rate go hand in hand. We recommend cameras that have at least 8 to 9 fps in order to capture fast motion.
To make sure your photos are tack sharp, you’ll need a fast autofocus system. The latest mirrorless cameras have come equipped with some of the most advanced autofocus systems yet. Cameras like the Sony A9II, A1, or A7RIV as well as Canon’s R5 and R6 come equipped with animal eye tracking which can even track birds in flight.

Since, for the most part, you’ll be using a high shutter speed, shooting hand-held shouldn’t be a problem. We recommend using the reciprocal rule when deciding if you need a tripod or not. Basically, if your focal length is larger than your shutter speed, it’s time to use a tripod. For example, if you’re shooting at 300mm, anything 1/300 of a second or faster you can shoot hand-held. Anything below that threshold should be on a tripod or monopod.
Lenses
For professional wildlife photographers, heavy-duty telephoto lenses are a dream to use. Of course, these lenses typically come with an equally hefty price tag. To put it in perspective, the new Canon RF 400mm F2.8 retails for $11,999. Other brands are in the same boat with the Sony 600mm F4 listed at $12,999 and the Nikon 400mm F2.8 for $11,196. These are top-of-the-line lenses, but don’t fret because there are plenty of affordable alternatives for each brand. Some of these alternatives include 100-400mm lenses, a RF 100-500mm for Canon, 200-600mm for Sony, and a 200-500mm for Nikon. Third party brands like Sigma and Tamron also have 150-600mm lenses that customers have raved about. These lenses typically range from $1,400 to $2,800—making it more attainable for the average consumer.

The Approach
One of the most important factors when it comes to bird photography is having respect for the animal and its environment. Birds have impeccable vision and will most likely see you coming before you see them unless you're being careful. All birds have different comfort or tolerance levels determining how close you can get without them flying away. The key is making the bird feel safe and relaxed.
You’ll want to have a slow, patient approach without any sudden movements. You might not want to stare directly at the bird for long periods of time since they can sense eye contact like most prey. Make sure not to wear bright colored clothing but instead neutral tones to blend into the environment. Keep noise to a minimum and remember to keep your cell phone on silent. If you have a camera with silent shutter capabilities, we recommend using it.

Photographing Birds
When photographing birds, it’s always good to shoot in RAW. This allows for more room to work with when editing. We recommend shooting in single point auto focus with continuous AF or servo AF turned on. For the smooth, creamy bokeh or background blur, and to isolate the bird from the background, try using a wide aperture. Exposure is important especially when trying to find the right aperture/shutter speed balance. Look for areas with great lighting. Typically, early mornings or late afternoons when the sun is low have the best conditions. Plus, you’re likely to see more activity during those times anyway. When focusing, make sure to focus on the bird’s eye, or when in flight, focus on either the chest or head.

Finding the right places to capture specific birds can be difficult. We have several birders in our customer base and recommend befriending other bird photographers to find out the best places to go. Researching certain locations and types of birds can also go a long way. Make sure to keep practicing and mastering your craft. Find purpose in your images and try to tell a story. Hopefully, these tips gave you a better insight on how to get started in bird photography. For more helpful tips, check out our blog by wildlife photographer, Lydia Ripplinger.

