Fall. Autumn. Harvest. It’s more a state of mind than a season. For yours truly, autumn is far and away my favorite season. Why? It’s the colors. Scenes that are already memorable are truly set off by fiery reds of Maples, or golden hues of Aspens. I would imagine autumn is a great time for most anyone who loves the outdoors but for a nature photographer, it simply doesn’t get better. I try to make the weeks of fall the busiest time of the year for me with camera in hand. This season is brief, and the show doesn’t last long, so it’s important to maximize the potential of the season. Here are a few photography related topics that have improved my fall images over the years.
1) Understand and present the best light in your fall images. Keep in mind the leaves that produce all the color are shiny and have a reflective quality and for this reason, the crisp yellows and bright reds are well shown in diffused light. There are 2 great opportunities you have to capture foliage with diffused light. The first and most predictable diffused light is pre-sunrise and post sunset. Light during these times is very soft, casting evenly across your subject matter.
Rain or snow storms even at mid-day can cast excellent diffused light for fall foliage. Another plus to shooting in the rain or snow is the moisture clinging to your subject will actually work to saturate the colors, so when the weather turns bad, grab your camera and get out there!
 I was able to shoot this around noon, diffused light and saturated colors provided by the rain storm.
Diffused light is effective, but it’s not the only conditions that will look great for fall imagery. Typically anytime during the golden hours of soft light at sunrise and sunset will lend well to images.
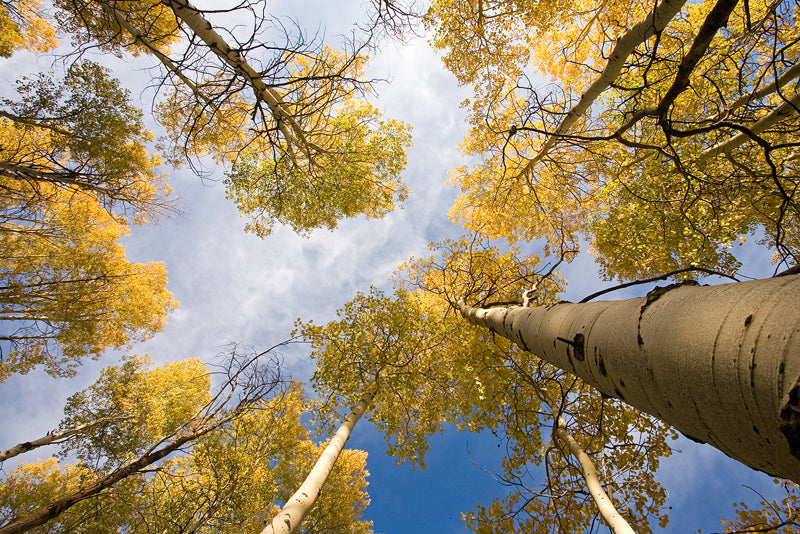
 Sunset light filtering through the tree tops illuminated this scene. The Aspen trunks used as leading lines to the color foliage in the tree tops.
2) Use a polarizing filter. This will enhance your images for two big reasons. Number one, it reduces the glare cast by sunlight hitting the foliage you’re trying to shoot, allowing your camera the cut through reflections and record the colors more accurately. The second reason is what the polarizer will do to the sky—in particular on a blue bird day. Because it is cutting out water vapor in the sky, it will present a deeper blue more accurately reflecting the color of the sky.
3) Use the colors to guide your compositions. Depending on the scene, this may include the frame being filled and dominated by the colors, or it may be a subtle add to an already balanced composition. The reds, yellows, and browns found during fall can also be used to layer a scene nicely.
 The colors in this scene are a subtle add. Look for opportunities to add color to an already complete composition. )
One of the best ways to translate the 3D scene you’re viewing with your eyes at the time into a 2D plane to be presented to your viewer is to layer. Varying colors are an excellent way to add depth to your scene.
One of the best ways to translate the 3D scene you’re viewing with your eyes at the time into a 2D plane to be presented to your viewer is to layer. Varying colors are an excellent way to add depth to your scene.
 The colors themselves are the subject matter of this image. The alternating hues of red to yellow to green layer the image, giving it depth from foreground to background. Look for opportunities to layer scene with the hues of Autumn.
4) Scout locations. This can happen during fall, but to be most effective it helps to plan even during the summer months. When you’re out exploring local hikes, try to be cognizant of where Aspen, Maple, and Cottonwood trees may lend well to a composition during fall. Getting familiar with your local scene will greatly enhance your fall images. Often, the best shots come from a pre-visualization followed by excellent execution in camera with ideal lighting. If you’re planning on traveling to a new or unfamiliar location do some research. Many of the popular photography destinations have great guide-books written with a photographer in mind. Also, looking at other’s images from the area can inspire you. Best case scenario, they will inspire you to go on location and find a unique composition all your own.
Fall is a great time to be outside, so even if your trek doesn’t yield award-winning images, there’s a good chance you’ll be damn glad you had the opportunity to enjoy the great outdoors with camera in hand. If you want to make the most of the fleeting weeks of autumn, try using the techniques mentioned above, but most of all, get out as often as possible. In December, with short days and snow on the ground, you’ll look back fondly on those crisp autumn days spent exploring.


