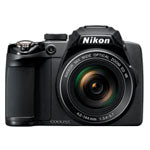
This service provides software for upgrading the COOLPIX P500 firmware to v1.1. Verify your camera’s firmware version using the instructions below. If this latest version is already installed in your camera, you need not update the firmware.
Modifications enabled in this version
- When a fully charged battery was inserted in the camera, and then the camera used, then turned off and left for a while, in some rare cases the battery was exhausted and the camera could not be turned on again. This issue has been resolved.
- In some rare cases, the monitor failed to properly display images with continuous shooting at a setting of Continuous L. This issue has been resolved.
- When the SD memory cards listed below were inserted into the camera and the camera turned on, the message "This card cannot be used." was sometimes displayed. This issue has been resolved.
- SanDisk Extreme Pro SDHC UHS-I (32 GB, 16 GB, 8 GB)
- SanDisk Extreme SDHC UHS-I (32 GB, 16 GB, 8 GB, 4 GB) - An issue that caused settings registered using the Save user settings option to be reset when camera settings were reset using the Reset all option in the setup menu with [U] (user setting) shooting mode enabled has been resolved.
How to verify your cameras current firmware version
-
Turn on the camera.
-
Press the MENU button to display the menu screen.
-
Select the Setup Menu.
-
Select Firmware version from the setup menu.
-
The camera's firmware version will be displayed.
-
Turn off the camera.
Install Update
This is the quick install guide, for detailed instructions click the link below.
Power the camera from AC adapter unit or use a fully charged battery.
-
Create a new folder with an appropriate name on your computer's hard drive.
-
Download the Windows (.EXE) or Macintosh (.DMG) file from the links at the bottom of this page to the folder created in step 1.
-
Run the downloaded file to create a folder called P500Update which contains the firmware folder.
-
Use a card reader or similar device to copy the firmware folder to the root directory of a formatted SD memory card.
-
Insert the memory card into the camera's memory card slot and turn on the camera.
-
Select Firmware version from the camera's setup menu and follow instructions displayed to upgrade the firmware.
-
After the upgrade is complete, turn the camera off and remove the memory card.
-
Access the Firmware version item in the camera's setup menu to confirm that the firmware has been upgraded.
| Windows: Detailed Firmware Upgrade instructions |
Macintosh: Detailed Firmware Upgrade instructions |

